
REVIEW · CANADA
Whistler Via Ferrata Tour
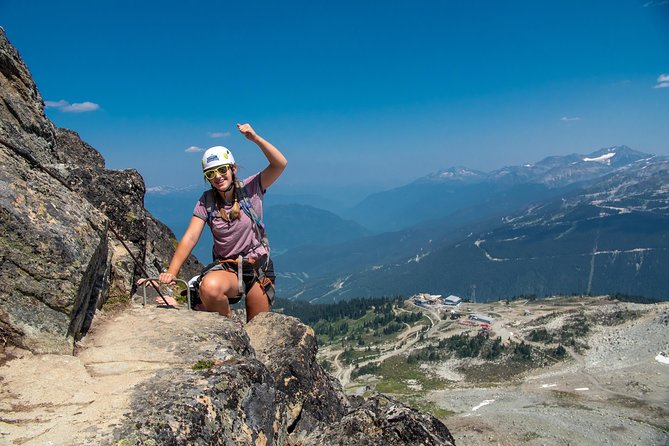
The Whistler Via Ferrata turns a mountain day into a hands-on alpine adventure. You ride up by gondola, cross the base of a glacier, scramble over rock, then clip into fixed safety cables and climb the side of Whistler Mountain using metal rungs and handholds. It feels more active than a sightseeing ride, but you never need prior climbing experience.
I like the small maximum group of six and the patient guiding from people such as Maya, Jeremy, Victor, Rob, and Emile. I also like the built-in pause halfway up for water, snacks, and photos. The catch is simple: this is more demanding than the friendly beginner label suggests, especially if you are short, less flexible, unused to altitude, or uneasy with heights.
Key points to know before you book
- The route starts with a glacier-base hike: Expect 30 to 45 minutes of walking before the actual cable climb begins.
- The climb is protected, not effortless: You stay clipped to safety cables, but your arms, legs, and balance still do real work.
- The group is capped at six people: That gives your guide time to explain each section and help when a move feels awkward.
- The Peak 2 Peak gondola ticket is extra: Contact Mountain Skills Academy & Adventures before your outing to arrange the required lift ticket.
- Gloves and water matter: Bring hiking shoes, gloves, a small backpack, water, snacks, and a rain jacket.
- Morning and afternoon departures differ: One August climber found the morning route hotter because of the sun’s position, while an earlier start can leave more time to explore the mountaintop later.
What the Whistler Via Ferrata really feels like
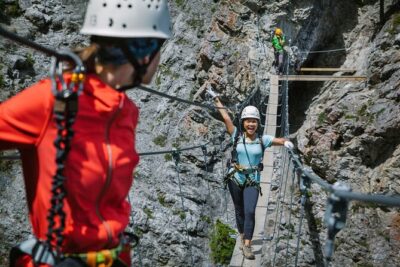
A Via Ferrata is a mountain route fitted with fixed cables, ladders, rungs, and other climbing aids. You are not free-climbing bare rock. Your harness connects you to the safety system, and your guide shows you how to move from one section to the next.
That protection helps, but it does not make the route passive. You still pull yourself onto rungs, reach between handholds, step across uneven rock, and manage your body on a steep slope. Think of it as a guided mountain climb for active hikers, not a gentle walk with a view.
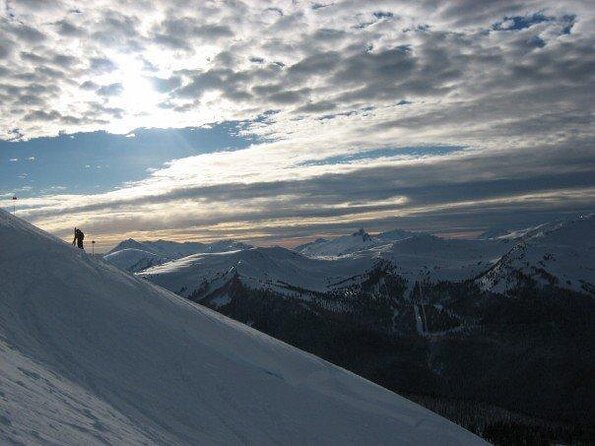
The setting gives the outing its appeal. Snow, glacier ice, rock, high mountain air, and views toward Whistler’s valleys appear along the route. The reward comes in stages, not only at the top. You see more as you climb, then reach a point where the mountain opens around you.
You should have a moderate level of fitness. The route suits someone who walks regularly and can handle a few hours of uphill activity, but it can test your reach and strength. One participant in their late fifties found the climb genuinely overwhelming at points, while an athletic family member also found it demanding. That is useful guidance: do not book this solely because the tour does not require climbing experience.
More Via Ferrata Routes in Canada
- Banff: Mount Norquay 2.5 or 4-Hour Guided Via Ferrata Climb
★ 4.9 · 305 reviews - Small-Group Guided Via Ferrata Climbing with Banff’s Best Views
★ 5.0 · 195 reviews - Squamish Via Ferrata Adventure
★ 5.0 · 71 reviews
Starting at Garbo’s Cap Bar and riding toward the glacier
The tour begins at Garbo’s Cap Bar at 9:00 am. Transportation is not included, so you need to reach the meeting point on your own. From there, the required gondola ride takes you up toward the Whistler Blackcomb alpine area.
The Peak 2 Peak Gondola ticket is not included in the tour price. This is the main cost detail to settle before the day begins. The operator asks you to contact Mountain Skills Academy & Adventures to purchase the lift ticket, and arranging it ahead of time can prevent a slow start.
At the top, your guide supplies a helmet and harness, along with the climbing and glacier equipment. Hiking boots are available if required, though you should plan to arrive in hiking shoes that you can trust on uneven ground.
The gondola ride is not just transport. It shifts the outing from resort activity to mountain route. You leave the base area behind, gain height quickly, and begin the day among snow and rock rather than shops and paved paths.
The 30 to 45 minute glacier-base hike
Before clipping into the cable system, you walk for roughly 30 to 45 minutes across the base of the glacier. This part gives you time to settle into the altitude, meet your guide, and get used to the group’s pace.
Do not treat this approach as a throwaway walk. Snow and uneven ground can make it tiring, especially in changing weather. Wear shoes with good support, and use wool socks if your feet tend to get cold. Sunscreen also matters. One climber who had a strong fear of heights found the views and exposure manageable, but still stressed the need for sunscreen and water.
Your guide may point out glacier features, rock formations, and details about the area as you walk. Victor received particular praise for explaining each stage patiently and for drawing attention to the mountain’s geology. Rob was also noted for sharing his enthusiasm for nature along the route.
This opening section is a good test of how your body feels. If the approach already feels hard, tell your guide early. The group is small, and the point of a small group is that the guide can adjust advice and pacing.
The scramble before the cables
A short scrambling section comes before the main climb. Scrambling sits between hiking and climbing. You use both hands and feet, but the movement is not presented as technical rock climbing.
This is where the route begins to feel less like a standard mountain walk. You may need to choose a foothold, shift your balance, and use your hands to steady yourself. The guide will explain what comes next, and the small group allows people to move one at a time rather than crowding a busy route.
If you are short or have limited flexibility, this section can require extra effort. The fixed equipment helps once you reach the cable system, but it cannot shorten a reach or remove every awkward step. Take your time, keep your body close to the rock, and ask for help when a move does not feel clear.
Same rush, a different way to get it:
- Niagara Falls, ON: Jet Boat Tour on Niagara River
★ 4.8 · 1,128 reviews - Niagara Falls Canada Open-Top (Wet) Jet Boat Tour
★ 5.0 · 1,000 reviews - Montreal: Jet Boating on the Lachine Rapids
★ 4.9 · 360 reviews - Canmore Caving Adventure Tour
★ 5.0 · 356 reviews
Clipping in and climbing Whistler Mountain
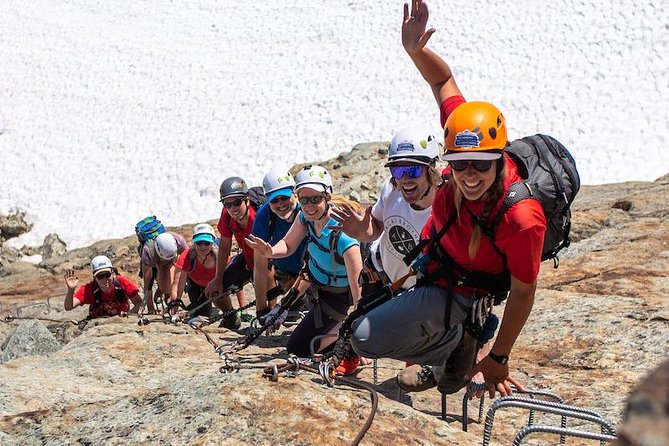
Once you reach the cables, your guide explains how to use the harness and safety attachments. You clip into the fixed line, then climb upward using metal rungs and handholds. The safety system is designed to protect you, but you still need to remain attentive to each step.
The climb is the heart of the experience. You work upward in short sections, with the mountain and valley views changing as you gain height. The route offers an unusual middle ground: you get the focus and physical effort of climbing without needing to bring your own rope or technical gear.
Your guide’s role matters here. Jeremy helped one group feel at ease when anxiety crept in. Theresa placed herself near a participant who was less comfortable walking through snow and climbing. Victor was praised for being patient and clear. Those details tell you what a good guide adds: not just safety instructions, but calm decisions and encouragement when your legs or nerves start to fade.
At the halfway point, the group stops for water, snacks, and photos. Bring your own supplies, since snacks and water are not included. This break is practical as well as scenic. Eat before you feel depleted, drink regularly, and use the pause to check your gloves, clothing, and energy.
After the break, you continue up toward the peak of Whistler Mountain. The final section may feel harder because your muscles have already worked through the approach and first half of the climb. Keep your movement steady rather than rushing to finish.
Reaching the top and making the most of the mountain
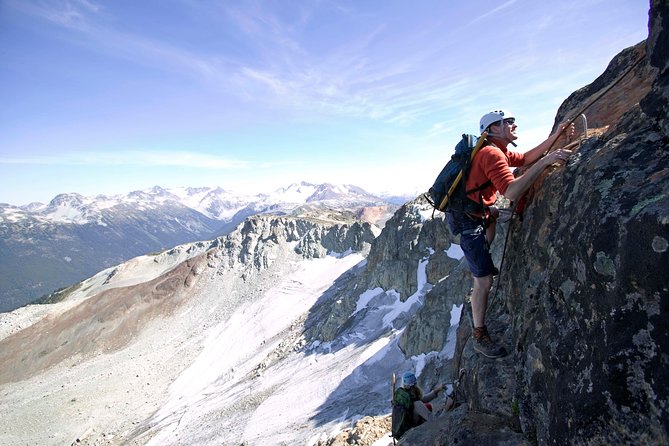
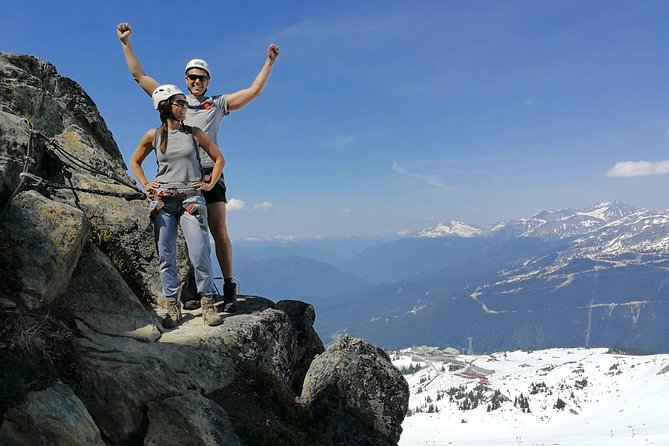
The high point delivers the main visual reward. On a clear day, you can expect broad views of Whistler’s mountains and valleys, with snow and glacier features adding to the alpine setting. A bridge near the top was a highlight for one family and gives you another memorable place for photos.
Cloud can change the day. An overcast outing may hide much of the scenery below, and weather can shift quickly in the alpine zone. Yet the climb remains an active experience even when the views fade. The operator runs the tour in all weather conditions, so dress for rain, wind, sun, and cold rather than trusting a warm forecast at the village.
One group completed the route during a snow blizzard and still found the guides encouraging and safety-focused. That does not mean poor weather will feel comfortable for everyone. If you want the best chance of distant views, check conditions before you go and bring the listed rain jacket. If the route becomes unsafe because of snow, the operator may offer an alternative outing, such as the cliff walk and glissading combination.
An earlier tour can make sense if you want a longer afternoon on the mountaintop. After the Via Ferrata, you may have time for more trails around Whistler Mountain or for the Peak 2 Peak ride to Blackcomb, depending on your plans and operating conditions. An afternoon departure may suit you better if you prefer a slower morning, but it gives you less time afterward.
How difficult is it for a beginner?
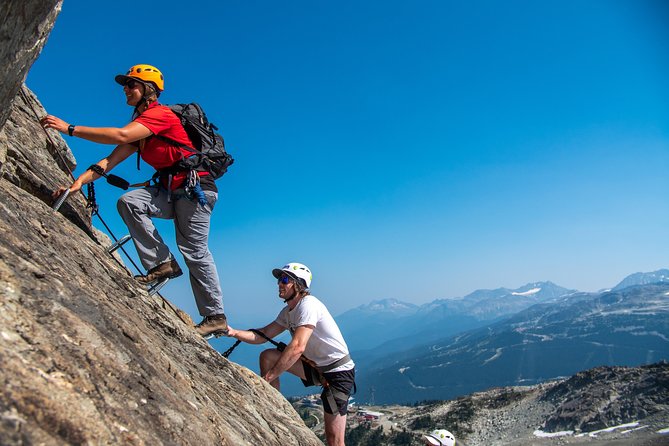
The tour is suitable for beginners in the sense that no climbing background is required. You receive the necessary equipment and instruction, and the guide leads the group through the system.
Beginner-friendly does not mean easy. You should be ready for a 30 to 45 minute approach, a scramble, a steep cable climb, and several hours outside. The route can be physically challenging even for someone who is generally fit. Height anxiety is another factor. The safety cable can reduce the risk, but it does not remove the feeling of exposure.
I would choose this for someone who enjoys a challenge and can stay calm while learning new movements. I would be cautious about booking it for a person with limited mobility, serious difficulty reaching between handholds, or little tolerance for steep terrain. The minimum age is 12, and children must be accompanied by an adult.
Your guide can help with technique and confidence, but the route still asks you to participate fully. Bring fortitude along with your camera.
Guides, group size, and the value of personal attention
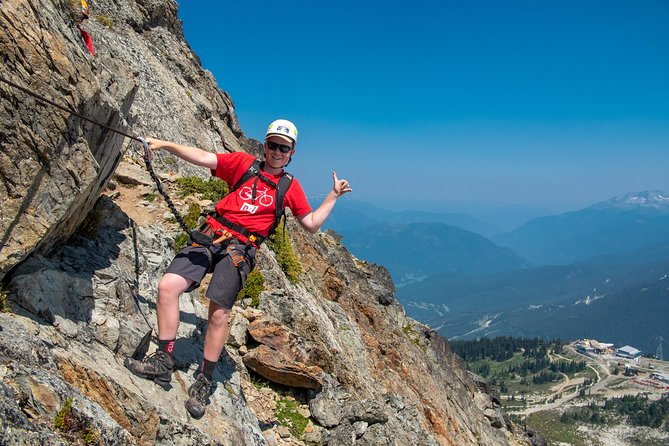
The tour has a maximum of six people. That is a major benefit on a route where the group must pause at climbing sections and where each person may need different help.
Guides including Maya, Jeremy, Victor, Rob, Emile, Nicolas, Nick, and Theresa received warm praise for clear instruction, patience, good humor, and support. The important point is not any single name. It is that the guide can stay close to the group, explain each move, point out geological features, and help a nervous climber keep going.
A large group could make this type of outing feel slow or impersonal. Here, the small format gives you a better chance to ask questions and receive direct feedback. It also means the pace can be shaped by the least comfortable person, so do not expect a fast, athletic ascent.
The guide is also your interpreter of the mountain. You are not simply climbing for exercise. Along the way, you may learn about glaciers, rock formations, and the shape of the Whistler area. That extra context gives the scenery more meaning.
Is the $149.46 price good value?
At $149.46 per person, the price is reasonable for a four-hour guided climbing experience with a small group and technical equipment included. You are paying for the guide, helmet, harness, climbing gear, and glacier equipment, not just access to a trail.
The value depends on how you use the day. If you want a simple scenic ride, the extra cost and physical effort will not make sense. If you want a structured challenge that combines a gondola ascent, glacier-base walk, instruction, climbing, and mountain views, the price is easier to justify.
Remember the additional costs. The required Peak 2 Peak Gondola ticket is not included. Transportation to the meeting point is not included either, and you need to bring your own water and snacks. Gratuity for the guide is suggested, so build that into your budget if the service is strong.
The tour can be booked with a mobile ticket and is offered in English. It is often reserved well ahead of time, with bookings commonly made about 35 days before the outing. That timing suggests you should not wait until the last minute if your Whistler dates are fixed.
What to wear and carry
Keep your kit simple and useful:
- Hiking shoes or sturdy hiking boots
- Gloves to protect your hands from the metal rungs and cable system
- A small backpack
- Water and filling snacks
- A rain jacket
- Sunscreen
- Warm, practical layers
The gloves deserve special attention. One climber recommended them to prevent sore hands and calluses. Weather can also change from clear sun to cloud or snow, so do not dress only for conditions at the village.
Hiking boots are available if required, but it is still wise to arrive prepared. Ask about equipment needs before departure if you are unsure. The operator supplies the climbing and glacier equipment, but you remain responsible for clothing, food, and water.
Cancellation and weather planning
You can cancel for a full refund up to 24 hours before the local start time. Changes or cancellations made less than 24 hours ahead are not accepted for a refund.
The tour requires a minimum number of participants. If the operator cancels because that minimum is not met, you will be offered another date or activity, or a full refund.
Since the experience runs in all weather, check the forecast without assuming that a sunny village means a warm summit. Bring the rain jacket, protect yourself from the sun, and accept that cloud may limit the views. If the route cannot safely operate because of snow, an alternative activity may be offered.
FAQ
Do I need climbing experience?
No. The tour is suitable for beginners and includes instruction plus all climbing equipment. You still need moderate physical fitness and the ability to handle a scramble and steep climbing section.
What is included in the tour?
A local professional guide, helmet, harness, climbing equipment, and glacier equipment are included. Hiking boots are available if required.
Is the Peak 2 Peak Gondola ticket included?
No. The required Peak 2 Peak Gondola ticket is extra. You should contact Mountain Skills Academy & Adventures to purchase the lift ticket.
How long does the activity take?
The tour lasts about four hours. The walk across the glacier base takes approximately 30 to 45 minutes before the scrambling and cable climb.
What should I bring?
Bring hiking shoes, gloves, a small backpack, water, snacks, and a rain jacket. Sunscreen and warm layers are also sensible choices for the mountain setting.
What is the minimum age and group size?
The minimum age is 12. Children must be accompanied by an adult, and the tour has a maximum of six participants.
Should you book the Whistler Via Ferrata?
Book it if you want an active mountain challenge with a guide, dramatic views, and a real sense of getting somewhere under your own power. It is a strong choice for fit hikers, outdoor-minded families with older children, and anyone curious about climbing but not ready for a technical climbing course.
Skip it if you want a relaxed sightseeing day, dislike heights, or are not prepared for a physically demanding route. The safety cables lower the risk, but they do not make the climb easy.
Bring gloves, water, snacks, sunscreen, and patience. Check the gondola cost before booking, allow time for the approach hike, and choose an earlier departure if you want to explore more of the mountaintop afterward. For the right person, this is one of Whistler’s most memorable ways to meet the mountain, one rung at a time.
Just added around Canada
- Squamish Via Ferrata Adventure★ 5.0 · 71 reviews
- Banff: Beginner Canyoning Half-Day Tour★ 4.7 · 75 reviews
- Adrenaline Canyoning Tour★ 5.0 · 39 reviews
- Adrenaline Canyoning Kelowna★ 5.0 · 98 reviews
- Canyoning half day – Heart Creek Canyon (beginner level)★ 5.0 · 130 reviews
- Jet Boating Montreal’s Lachine Rapids★ 5.0 · 144 reviews
- Small-Group Guided Via Ferrata Climbing with Banff’s Best Views★ 5.0 · 195 reviews
- Niagara CANADA, Domed (Dry) Jet Boat Tour★ 4.5 · 220 reviews
Via Ferrata Climbing, compared.
Mount Norquay 2.5 or 4-Hour Guided Via Ferrata Climb
Read our review →
Small-Group Guided Via Ferrata Climbing with Banff’s Best Views
Read our review →
Via Ferrata in Gran Canaria. Vertical adventure park. Small groups
Read our review →Browse the lists this tour appears in